Author: Chefalexmills

  • The Roadside Loaf

    Hawaii isn’t just paradise. It’s proof that culture is built in kitchens long before it’s written in history books.

    My family loves visiting the islands. The landscapes are dramatic, the beaches are unreal, and the pace of life forces you to slow down whether you want to or not. But what keeps pulling me back isn’t just the view. It’s the food.

    Hawaii’s cuisine is a living map of its history. It started with the early Polynesian voyagers who brought canoe crops like taro and breadfruit and built a food system rooted in respect for land and sea. Then the 19th century plantation era reshaped everything. Workers from China, Japan, Portugal, Korea, Puerto Rico, and the Philippines labored side by side. They shared meals. They swapped ingredients. They blended techniques. What came out of that was not fusion for trend’s sake. It was survival, adaptation, and eventually pride.

    From the deep, earthy richness of food cooked in a backyard imu to the postwar embrace of Spam as a pantry staple, to the chef driven refinement of Hawaii Regional Cuisine in the late 20th century, the islands’ food tells a story. Migration. Hardship. Community. Ohana.

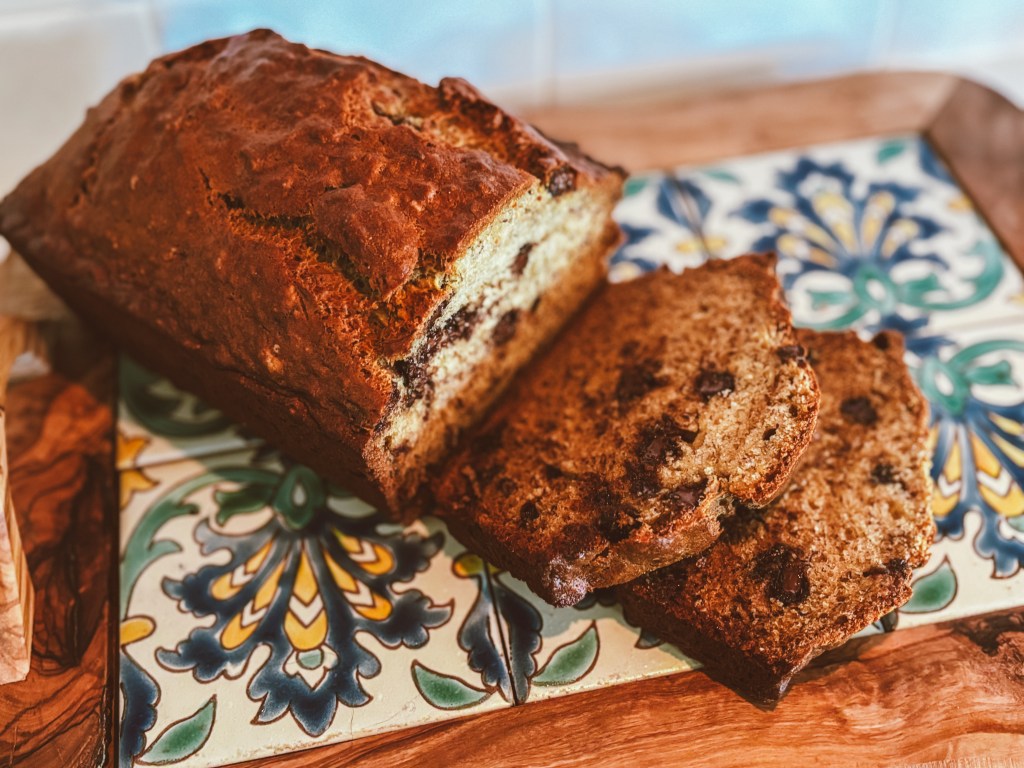
    And then there is banana bread.

    Bananas are not native to Hawaii in the strict botanical sense, but they arrived with early Polynesian voyagers as canoe plants, crops intentionally carried across the Pacific and planted wherever those voyagers settled. Over time, bananas became naturalized across the islands, thriving in backyards and along roadsides. Walk almost anywhere in Hawaii and you will see them growing freely. So it makes sense that banana bread would eventually become part of the local rhythm. It is practical. It is forgiving. It travels well.

    Banana bread as we know it, though, is a mainland invention born out of the Great Depression. Quick breads surged in popularity in the 1930s once baking powder and baking soda became household staples. Cookbooks encouraged home cooks not to waste food, especially overripe bananas. Mashing them into a simple batter was economical and smart. No yeast. No waiting. Just stir and bake.

    In Hawaii, the loaf found its own lane a little later. As tourism expanded in the mid to late 20th century, especially along scenic drives like the Road to Hana, small roadside stands began selling homemade loaves to travelers winding their way along the coast. What started as practical home baking became a roadside ritual. Something warm, wrapped in parchment, handed through a window with a smile.

    One of our favorite traditions when we are driving around the islands is pulling over at those little stands for a still warm loaf. It is simple. Humble. Unpretentious. Thanks to Gwen Stefani, I will never forget how to spell banana.

    Banana bread is one of the great practical bakes. It respects the ingredient. It turns what looks past its prime into something people fight over at the table.

    We do have an ongoing debate in our house. I prefer it as is. Clean. Straightforward. Let the banana speak. My wife and the kids vote for chocolate chips.

    I will let you decide which side you are on.
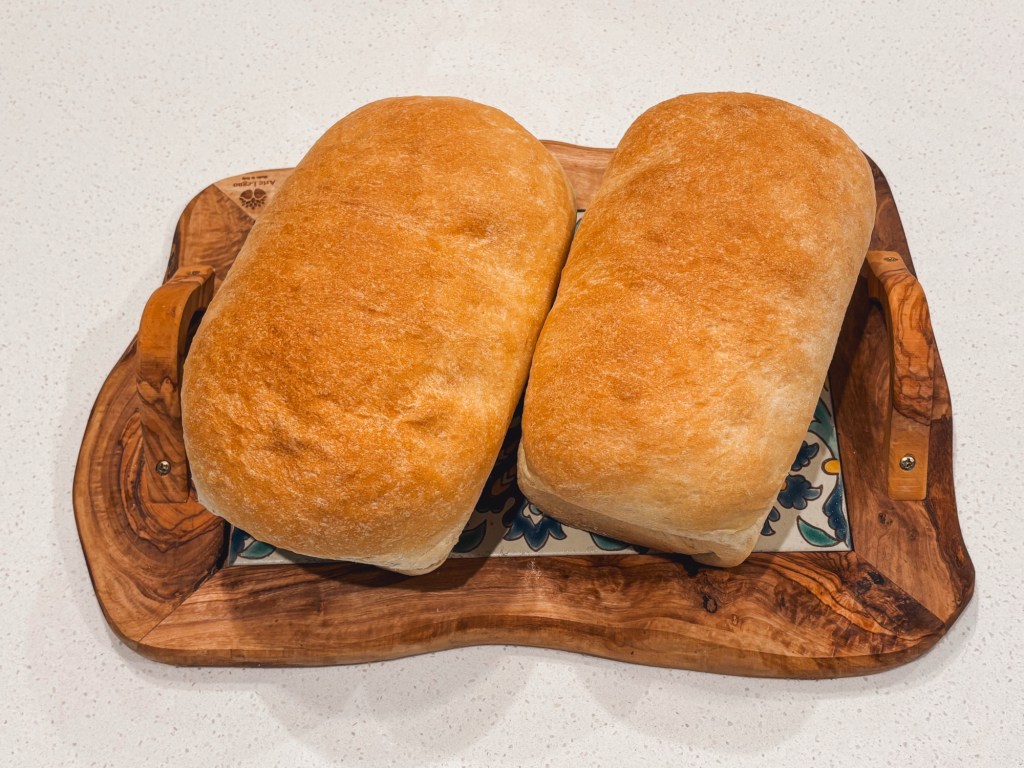
    Banana Bread

    Ingredients

    2 – 4 Ripe Bananas, mashed (about 3–4 medium or 2 large)

    115g Unsalted Butter, room temperature

    110g Granulated Sugar

    110g Light Brown Sugar

    2 Large Eggs (about 100g without shells)

    5g Vanilla Extract

    250g All-Purpose Flour

    5g Baking Soda

    3g fine salt

    170g chocolate chips (optional)

    Method of Production

    1. Preheat the oven to 325°F (163°C). Line an 8×4-inch loaf pan with parchment paper, leaving an overhang for easy removal, or grease thoroughly with butter or baking spray.
    2. In a medium bowl, mash the bananas until mostly smooth with small bits remaining for texture. Set aside.
    3. In a separate mixing bowl, cream the butter, granulated sugar, and brown sugar together until light and fluffy, about 2–3 minutes.
    4. Add the eggs one at a time, mixing well after each addition and scraping down the sides of the bowl as needed.
    5. In a separate bowl, whisk together the flour, baking soda, and salt.
    6. Add the dry ingredients to the butter mixture and mix on low speed just until combined. Do not overmix.
    7. Add the mashed bananas and vanilla extract. Mix until fully incorporated.
    8. Fold in the chocolate chips until evenly distributed throughout the batter.
    9. Transfer the batter to the prepared loaf pan and smooth the top.
    10. Bake for 55–65 minutes, or until the loaf is well risen, deeply golden brown, and a cake tester inserted into the center comes out clean or with just a few moist crumbs.
    11. Cool in the pan for 10 minutes, then lift out and transfer to a wire rack to cool completely before slicing.
    12. Slice thick. Serve warm or at room temp. Don’t expect leftovers.
  • Patience Is the Secret Ingredient

    This is the winter staple in our house. My daughter lovingly refers to it as simply “Daddy’s Stew,” but it’s Guinness Beef Stew. Though I have made it with other Irish stouts… just don’t tell the naming police.

    Guinness beef stew is a modern take on traditional Irish stew. The original was made with lamb or mutton, but many modern versions lean into beef. It’s built on potatoes, onions, and root vegetables like carrots, thickened lightly with flour, then left to slowly transform. Over a long simmer, the meat becomes tender, the vegetables soften, and the flavors melt together into something rich and deeply comforting.

    One of my favorite parts is tasting it at the beginning of the two hour simmer, just to see how dramatically the flavors evolve by the end. It’s a quiet little reminder of what patience can do in a pot.

    Now, I know many people serve their Guinness beef stew over a cloud of mashed potatoes. I fully support that decision. I will never stand in the way of butter and cream meeting thick stew. But in our house, I go a different direction.

    I use fingerling potatoes directly in the stew. They hold their shape, soak up all that rich stout-laced broth, and give you little buttery bites throughout instead of one soft blanket underneath. It makes the stew feel complete in the bowl, like everything belongs exactly where it is.

    I also take a little extra care when prepping. Every ingredient gets cut into proper bite size pieces. Not rustic boulders. Not carrot logs the size of a toddler’s forearm. Spoon sized. Balanced. Intentional.

    A stew should fit perfectly on the spoon. A little beef, a bit of potato, a slice of carrot, all in one bite. That’s the goal. Every spoonful should taste like the whole pot. It’s a small detail, but it changes everything.

    And then there’s the bread. A big, hearty slice of sourdough. Not optional. You need something with structure, something that can drag through the bottom of the bowl and come back heavy with broth. If you are not wiping the bowl clean with bread, we have made a serious tactical error.

    This is not a rushed meal. It is not a weeknight shortcut. It asks you to slow down. To let the beef brown properly. To let the onions soften. To let the stout do its quiet work in the background while the house fills with that deep, savory aroma that makes everyone wander into the kitchen asking when it will be ready.

    You can’t bully a stew into greatness. You can’t crank the heat and hope for magic. The transformation happens low and slow, in its own time.

    And somewhere between the first taste at the beginning of the simmer and the last spoonful from the bottom of the bowl, you remember something simple.

    Patience is the secret ingredient.

    Guinness Beef Stew

    Chef’s Note: I like to make this in an 8 quart (7.5 L) Dutch oven. It’s the perfect size to let everything simmer comfortably without overcrowding, and it distributes heat beautifully so every bite cooks evenly.

    Ingredients

    1134g Chuck Roast, cubed into bite-sized pieces

    30 ml Neutral Oil

    170g Bacon, cut into lardons (Round up to the nearest slice)

    2 Medium Onions, diced

    3 Garlic Cloves, minced

    24g All-Purpose Flour

    56g Tomato Paste

    680g Fingerling Potatoes, halved or quartered depending on size

    2 Carrots, cut into bite-sized pieces

    960 g chicken broth

    1 Bottle (330 ml) Guinness beer or other Irish stout

    2 Bay Leaves

    4 Sprigs Fresh Thyme

    Salt and pepper, to taste (Season as you go)

    Method Of Production

    1. Heat 30 ml of oil in your 8-quart Dutch oven over medium-high heat. Season the chuck roast generously with salt and pepper. Brown the meat in batches… crowding the pot is a sin. Remove browned meat and set aside.
    2. Brown the bacon until crisp.
    3. Toss in the onions and garlic, sautéing until soft and fragrant. This is where the smell starts to make your house feel like heaven.
    4. Sprinkle in the flour and stir until everything is coated.
    5. Add tomato paste. Mix carefully, scraping the bottom so it doesn’t burn, but allow the tomato paste to cook for a minute or two to deepen the flavor.
    6. Pour in the chicken broth and Guinness, scraping the bottom of the pot to lift all those delicious browned bits (the fond).
    7. Add the browned meat back into the pot.
    8. Add the fingerling potatoes and carrots.
    9. Add in the bay leaves and thyme sprigs. I like to tie them together into a little sachet using butcher twine so they are easier to remove later.
    10. Bring everything to a gentle simmer. Reduce heat, cover, and cook for 2 hours and 15 minutes, stirring occasionally. This is where patience starts to taste like magic.
    11. Uncover and simmer for an additional 45 minutes, stirring occasionally. Watch that broth thicken, the flavors deepen, and your kitchen fill with irresistible aromas.
    12. Remove bay leaves and thyme sprigs. Taste, adjust salt and pepper if needed.

  • Sorry Grandma, My Biscuits Are Better Than Yours

    Grandma is probably rolling over in her grave.

    I come from a long line of biscuit makers. My great grandmother taught my grandmother, who taught my mom, who eventually taught me. And no, I’m not talking about the British biscuit, the crisp cookie. I’m talking about the Southern staple that has anchored our tables for generations. And let’s be clear: biscuits are not just for breakfast.

    Southern grandmothers didn’t use recipes. They used instinct. A spoon, a bowl, a rolling pin. That was it. They mixed by feel. They judged the dough by touch. And if you looked like you were about to knead it too much, you risked getting smacked with that spoon.

    For years I was terrified to “work the dough.” I thought if my hands lingered too long the butter would melt, the structure would collapse, and my ancestors would collectively disown me.

    Fast forward a few decades.

    Now I make my biscuits in a stand mixer. I work the dough more than Grandma ever would have allowed. And here’s the part that feels almost sacrilegious to say out loud: I can make biscuits better than Grandma.

    Sorry, Grandma.

    There is one thing I will never change, though. White Lily is the flour for biscuits. Not because Southerners cling to brands out of blind loyalty, but because it’s milled from soft red winter wheat with around 9 percent protein. Most all purpose flours sit at 11 to 12 percent. That difference matters. Lower protein means less gluten development, which means tenderness. It’s built for biscuits. Not bread.

    This isn’t a recipe I expect you to nail on the first try. It might take a few rounds before you make one you’re proud of. Stick with it. It’s worth it.

    Eventually you won’t need the measurements. You’ll stop looking at the bowl and start feeling the dough. You’ll know when it’s ready.

    That’s why this post took me so long to write. I’ve been making biscuits by instinct for years. I couldn’t have told you the weights if you asked. I finally had to slow down, pull out a scale, and measure as I went.

    Somewhere along the way, feeling turned into numbers.

    And now you get both.

    Buttermilk Biscuits

    Ingredients

    350g AP Flour

    18g Baking Powder

    8.5g Salt

    56g Frozen Butter

    225g Whole Fat Cold Buttermilk (Life is too short for low fat buttermilk)

    50g Melted Butter  

    Method of Production

    1. Preheat oven to 350°F.
    2. In the bowl of your stand mixer, whisk together your flour, baking powder, and salt.
    3. Using your grater or Microplane, grate the frozen butter into the bowl of the stand mixer with your flour, baking powder, and salt mixture. Using the paddle attachment, mix at slow speed until the butter is well incorporated into the mixture. The flour should look coarse and mealy.
    4. Next, with the mixer still on low speed, slowly add the buttermilk until a shaggy dough forms. Stop mixing.
    5. Turn the dough out onto a lightly floured surface. Lightly flour the top of the dough and your hands and begin to gently press and fold the dough over on itself until the dough no longer feels wet and shaggy.
    6. After folding the dough over on itself a few times, lightly flour your rolling pin and begin to gently roll the dough out into a rectangle that’s ¾ – 1 inch thick.
    7. Fold the dough in half onto itself. Using the rolling pin, gently roll the dough out into another rectangle that’s ¾ – 1 inch thick. Repeat the fold and roll process 3 more times to build layers. *Note: You may have to lightly flour your rolling pin again.
    8. After you roll out your dough for the last time, use a 3-inch biscuit cutter. Dip your biscuit cutter in flour and cut straight down into the dough. Do not twist the biscuit cutter. Twisting seals the edges and hinders the biscuits from rising properly. Try to cut each biscuit as close to the edge of the dough as possible and as close to the previous cut as possible. I like to play a little game to see how many biscuits I can get on the first try.
    9. Place biscuits together on a parchment paper-lined baking tray, touching each other. They are communal and do better together. As they bake, they cling to each other and rise together.
    10. After you’ve cut as many biscuits as you can from the first roll out, combine the scraps and repeat steps 7–9. You won’t get as many biscuits as before, but there should be enough scraps to get one or two more.
    11. Bake in the oven for 15 minutes, then rotate the tray 180 degrees and bake for 15 more minutes.
    12. Remove from oven and brush hot biscuits with melted butter.
  • Salt Has Been Trying To Tell Us Something

    Season your damn food! Seasoning gets treated like a finishing move, a sprinkle at the end, a shake of pepper, and a hope and a prayer, but that is not how good food has ever been made. For most of human history seasoning was not about preference or personality because it was about survival. Salt mattered because food mattered. Before refrigeration salt was how meat lasted and how vegetables made it through winter. Entire trade routes existed because of salt, and Roman soldiers were even paid with it, which is where the word salary comes from. Salt was currency and power and preservation. It was never optional. Somewhere along the way we decided salt was dangerous and seasoning became something to fear instead of something to understand.

    Salt does not make food salty because its true purpose is to make food taste like itself. It pulls flavor forward and sharpens what is already there. When you season early salt has time to dissolve and move into the food so that proteins hold onto moisture better and vegetables release water to cook instead of burn. Waiting until the end to season is not restraint. It is indecision. Building flavor means seasoning as the food changes. You salt onions before they brown so they soften and sweeten. You season meat before it hits the pan so the inside tastes as good as the outside. You taste after something reduces because concentration changes everything. You adjust again when fat shows up because fat smooths edges, and you taste when you add acid because acid tells the truth.

    If you only season once, you are not building flavor but are instead reacting to it. Pepper has a role, too, and historically it was treated with respect as a sign of wealth. It was used intentionally rather than dumped on everything. Pepper is aromatic and lives in your nose as much as your mouth. Add it early and it melts into warmth, but add it late and it preserves its bright, aromatic, and pungent flavor. Pre-ground pepper has already missed that moment and should be thrown out. Buy a pepper grinder and whole peppercorns. Toast the peppercorns until aromatic in a dry skillet before putting them in your pepper grinder.

    This brings us to the most ignored part of cooking, which is to taste your food. If you are not tasting your food, you are not cooking; you are just following instructions and hoping things work out.

    Flavor changes as food cooks. What tasted fine ten minutes ago might not taste right now. Recipes do not know what your ingredients taste like or how salty your broth is or how hot your stove runs. You do. Taste after you salt and after something reduces. Taste after you add acid and before you serve. People who worry about oversalting usually do not taste enough. Tasting early prevents mistakes while tasting late creates them. Professional kitchens taste constantly because food moves. Seasoning is a conversation you keep having until the food is done talking. Once you season in layers and taste along the way cooking gets easier. You do not need a bigger spice rack. You need to pay attention to what you are cooking because flavor is built on purpose.

  • Morning Starts in the Skillet

    Country sausage, also known as breakfast sausage, is a staple on the American breakfast table, especially here in the South. Farmers used sausage to utilize all parts of the pig, creating inexpensive, high protein meals for themselves. It can take various forms such as fresh patties, links, or loose sausage and can feature a variety of seasonings like salt, black pepper, and sage. Common additions include brown sugar, thyme, garlic powder, onion powder, nutmeg, and paprika, plus optional heat from red pepper flakes or cayenne.

    Breakfast sausage is one of the three main components of my favorite breakfast dish, Biscuits and Gravy. I cook off the fresh sausage patties in a cast iron skillet then use the fat and drippings from the sausage to make that Southern take on the béchamel mother sauce: sausage gravy.

    Now, for my country sausage recipe you will probably need a scale with high precision. I’m talking about the type that the street pharmacist uses to weigh their products before bagging them up to fill “prescriptions.” You can click here for one. I developed this recipe for country sausage when I was the chef at a breakfast/lunch spot in Nashville (damn I miss that coffee). I used to make this sausage in 20 lb batches so you can scale this recipe up for however much you need. The recipe below is for a 1 lb batch.

    Country Sausage

    Ingredients

    454g Ground Pork

    6g Kosher Salt

    4g Dried Sage

    1g Black Pepper

    .75g Red Chili Flake

    .5g Ground Juniper Berry

    Method of Production

    Combine all ingredients in the bowl of your stand mixer and mix on low until all spices are evenly distributed. Weigh the sausage on a digital scale, then use your hands to shape it into patties.

    1. Your Culinary Wishlist: 10 “Why Didn’t I Buy This Sooner?” Tools (Part Two)

      Your Culinary Wishlist: 10 “Why Didn’t I Buy This Sooner?” Tools (Part Two)

      Happy New Year! In the first installment of this two part series, we talked about the benefits of using proper pans, quality knives, multiple cutting boards, a meat probe, and a kitchen scale. If you haven’t already read part one, pause now and go back to catch up. Now that you’re up to speed, let’s continue.

      Stand Mixer

      The next item on our list is a stand mixer. Yes, they take up precious counter space. Yes, it’s still worth it (even for you crazy New Yorkers with apartments the size of a matchbox). Stand mixers are serious multitaskers; you can whip butter, knead dough, shred chicken, make pasta, blend sausage, grind meat, and even mill flour.

      Do not skimp and buy a cheap one. Buy a high quality model and put it through the wringer. I’ve had the same pistachio colored KitchenAid for ten years now, and I’ve worked it harder than a treadmill in January. They’re worth every penny.

      Fish Spatula

      This is my all time favorite utensil: the fish spatula. This oddly shaped tool is my go to for almost everything cooked in a pan. First, it features a thin, flexible blade that is much slimmer than standard spatulas, allowing you to slide it under delicate foods without tearing. It gets between the food and the pan with minimal force. The best part? It doesn’t matter that the blade is metal, because you shouldn’t be using nonstick cookware anyway!

      Secondly, the blade is slotted and angled, allowing oil and butter to drain away while providing the leverage needed for better control. Finally, the thin metal handles high heat without warping and releases stuck on food easily. They’re strong enough for burgers, gentle enough for fish, and precise enough for eggs.

      Blender

      Soups, sauces, and smoothies! Blenders are the workhorses of the professional kitchen, and they deserve a place in your home, too. Just like the stand mixer, this isn’t a tool you want to skimp on. A quality blender should be able to take real abuse and still perform day in and day out.

      The uses are nearly endless. It creates purées, emulsions, and vinaigrettes with a level of smoothness that traditional methods simply can’t match. Beyond that, it handles frozen fruit, ice, and batters with ease, turning scraps into soups and saving you time, money, and cleanup. If you care about texture, speed, and consistency, a blender earns its spot on your counter.

      Bench Scraper

      The next item on the list won’t necessarily make you a better cook, but you’ll find yourself reaching for it every day: the bench scraper. There are two main types, plastic and metal, and I use both.

      The metal scraper is excellent for portioning dough, cutting pasta, scooping chopped vegetables, and scraping the counter after kneading. Plastic bench scrapers are usually flexible; they can do most things a metal one can, though they aren’t quite as rigid. However, they do a superior job of scraping the inside of a mixing bowl and are safe for delicate surfaces. Having both on hand makes prep faster, cleaner, and more precise.

      Microplane/Zester

      A Microplane (yes, it is a brand name, but through “genericization” it has become the common term) is one of those small tools that make a massive difference. It uses ultra sharp blades to finely shave ingredients, preserving essential oils and aromas to provide bigger flavor with less effort. It’s perfect for citrus zest, garlic, ginger, onions, hard cheeses, and whole spices. It’s fast, easy to clean, and takes up almost no space. If you care about flavor, a Microplane is a no brainer.


      Investing in the right tools isn’t about filling your drawers with gadgets; it’s about removing the friction between you and a great meal. When you stop fighting with dull knives or flimsy spatulas, cooking stops being a chore and starts being fun. You can find all my recommendations here.

    2. The Best Thing Since…Well, You Know

      The Best Thing Since…Well, You Know

      A little over a year ago, my beautiful wife, Meg (who, bless her heart, puts up with all of my nonsense like this blog and the hundreds of other hobbies I have), and I decided we were no longer going to purchase sandwich bread from the store. I had tried out different recipes for classic sandwich bread and felt like this was a weekly commitment I could easily keep up with.

      As I do with anything new I attempt to make, I researched the dish thoroughly, read through a bunch of recipes, and found one that was simple enough to start with. Over time, I’ve been able to tweak it, change it, and truly make it my own. After a year of making our sandwich bread from scratch, I can confidently say that it’s well worth the effort. The zen of kneading, the incredible smell as it bakes, and the kids eagerly waiting for it to cool down (you’re supposed to wait an hour after it bakes, but we aren’t always that patient!) are all part of the joy of making it at home.

      Just as with any baked good, your first attempt will likely not be your best. Do not be discouraged! Even after a year, I have some loaves that resemble construction material more than the staple of life. Keep at it, and you will be amazed by your progress and the delicious results. Below is the bread recipe and process that I use weekly. One batch makes two loaves.

      Sandwich Bread

      Ingredients

      275g Hot Tap Water

      230g Whole Milk

      114g Melted Butter

      14g Instant Yeast

      25g Sugar

      720g Unbleached All-Purpose Flour

      15 g Salt

      Method of Production

      1. Gently whisk together the water, milk, melted butter, yeast, and sugar either by hand or in a stand mixer bowl. Allow the mixture to rest for 10 minutes until the yeast is foamy and bloomed.
      2. If using a stand mixer, switch to the dough hook attachment.
      3. Add the flour and salt to the yeast mixture. Mix on low speed until a shaggy, cohesive dough forms.
      4. Remove the dough from the bowl and knead by hand on a lightly floured surface for 7 to 9 minutes until a smooth, elastic dough forms. If the dough is sticky, dust it lightly with extra flour, adding it slowly as you knead.
      5. Place the kneaded dough in a lightly oiled bowl and cover it with plastic wrap or a clean kitchen towel.
      6. Allow the dough to perform its first rise (bulk fermentation). Let it rise at room temperature until it has nearly doubled in size, which will take approximately 1 ½ to 2 hours, depending on your kitchen’s temperature.
      7. Once doubled, gently uncover the dough and gently punch it down to deflate the air.
      8. Transfer the dough to a lightly oiled work surface. Divide the dough into two equal halves.
      9. Shape each piece of dough into an 8-inch (20 cm) log or loaf shape.
      10. Place each shaped log into a greased loaf pan (standard 8.5 x 4.5-inch is common) and cover the pans loosely with plastic wrap.
      11. Allow the loaves to perform their second rise (proofing) for approximately 45 to 60 minutes, or until the dough is nicely domed and has risen about 1 inch above the edge of the pan. About 30 minutes into the proofing time, preheat your oven to 350˚F (175˚C).
      12. Remove the plastic wrap and bake the loaves for 28 to 30 minutes until the crust is golden brown.
      13.  Immediately remove the baked bread from the pans and transfer it to a wire cooling rack. Allow the bread to cool completely for 1 hour before slicing.

        Baking Note: Flour amounts can vary based on the humidity in your kitchen. You may need a little more or a little less flour to get the right dough consistency. Trust the feel of the dough more than the exact measurement.
    3. Your Culinary Wishlist: 10 “Why Didn’t I Buy This Sooner?” Tools (Part One)

      Your Culinary Wishlist: 10 “Why Didn’t I Buy This Sooner?” Tools (Part One)

      We all know the feeling. You’re trying a new recipe, you’ve got the ingredients ready, but your tools are letting you down. Maybe your dull knife is making chopping a chore, or your cheap skillet is creating stuck on messes. My goal for this blog is to help you become a better, happier cook at home. That starts with getting the right tools. I’m talking about simple, high-impact items that will make you feel like you instantly leveled up. If you’ve ever wished your kitchen was more functional, this list is for you.

      Proper Knives

      You don’t have to go out and buy the most expensive knife set at your local Williams Sonoma. Instead, put as many knives in your hand as possible to see what feels most comfortable to you. Go to your local kitchen store and just hold them like you would if you were chopping vegetables. Start with a good quality chef’s knife. When I say good quality, I mean one that will hold an edge well so you don’t have to sharpen it every week (note: honing with a honing steel and sharpening are two different things). This is the workhorse of the kitchen. You’ll find that cutting vegetables and slicing meats is much easier with a high quality knife. After you find a chef’s knife that you love, you can start piecing together the rest of your set (slicer, boning, paring, petty). We’ll go into this in more detail at a later date.

      Good Pans

      Stainless steel, cast iron, and carbon steel! Put your nonstick and aluminum pans where they belong…in the trash. Cast iron cookware has been around for over 2,000 years, while modern nonstick has been around for about 70. When cared for and used properly, cast iron, stainless, and carbon steel cookware is just as nonstick as the modern nonstick pan, without all the chemicals used to create that surface. Aluminum pans can also leach chemicals into your food and do not have the same even heat distribution and retention as cast iron and stainless steel. Like good quality knives, good pans will make cooking so much more easy and enjoyable.

      Kitchen Scale

      Chefs measure ingredients by weight. You should be, too. Cooking by weight is more accurate, efficient, and consistent. It removes the guesswork of using volume to measure. Look for a kitchen scale that has a high enough capacity for what you will be using it for, has the ability to switch between units (grams, ounces, pounds), and a tare function (the ability to zero out the scale while it still has something on it).

      Cutting Boards

      Notice it’s plural. You need at least two cutting boards: one for chicken and one for everything else. If you want one for seafood, one for beef, one for pork, one for chicken, and one for vegetables, even better! Make sure that the one you choose for chicken is dishwasher safe. Do not trust your hand-washing abilities to protect you from what raw chicken will leave behind. Hardwood cutting boards are the best but cost more. Polyethylene plastic is a good cost-friendly alternative, especially for raw meats. Glass and stone cutting boards will ruin your knives.

      Meat Thermometer and Probe

      Take the guesswork out of cooking meats. Using a meat thermometer is the most reliable way to ensure that meats reach the safe internal temperature needed to kill harmful bacteria. On the flip side, it will ensure that you are not overcooking, so your meats retain their moisture and tenderness. Meat thermometers help you achieve great results consistently.


      These simple items, from a sharp knife to a reliable thermometer, will eliminate the frustration and guesswork from your cooking. You can find all my recommendations here.

    4. About Me

      Hi, I’m Alex. I grew up in a small town in Georgia, but food has taken me all over the world. Over the years I worked in kitchens in Charlotte, Bergen (Norway), Oslo, Disney World, Chattanooga, Atlanta, and Nashville. For 12 years, I lived and breathed the life of a chef with long hours, hot kitchens, and the constant pursuit of making something better than the day before.

      Eventually, I hung up the apron to spend more time with my family, but my love for food never went away. Cooking has always been more than just work for me; it’s a way to connect, to share, and to create memories.

      This blog is my way of bringing that passion to you. I want to help take the fear out of cooking, to show that it doesn’t have to be complicated or intimidating. With the right guidance (and a little patience), anyone can put a great meal on the table.

      So whether you’re just getting started or looking to sharpen your skills, welcome! I’m glad you’re here. Let’s cook something together.